How To Host Static Website On Google Cloud Platform

Why pay for web hosting when you can freely host your static websites on Google Cloud Platform? In this quick tutorial, I am going to show you how I set up my personal website on Google Cloud Platform using the 5 easy steps below.
Google Cloud Platform is a suite of cloud computing services developed by Google. Google Cloud Platform runs on the same infrastructure that Google uses internally for its end-user products, such as Google Search, Gmail, file storage, and YouTube.
Step 1: Create Cloud Storage Bucket
Cloud Storage is a service for storing your objects in Google Cloud. An object is an immutable piece of data consisting of a file of any format. You store objects in containers called buckets. For this use case, I created a Cloud Storage Bucket that was used to store all website contents.
The following restrictions apply to the naming of a Cloud Storage bucket:
- Bucket name should be the domain name of your website and must be globally unique within GCP (for example,
www.somideolaoye.com). - Bucket names cannot be represented as an IP address in dotted-decimal notation (for example,
192.168.5.4).
## create a storage bucket
gsutil mb -b on gs://www.somideolaoye.com
Step 2: Upload HTML Files & Contents
After the Storage Bucket has been created, its time to upload the website files and folders to be served into the bucket.
It's important to note that this tutorial does not apply to dynamic websites (websites in PHP, Python etc.), it is only applicable to static websites (HTML, CSS and Javascript including ReactJS ).
## upload HTML file
gsutil cp Desktop/index.html gs://www.somideolaoye.com

## upload folder
gsutil cp -r Desktop/web_folder gs://www.somideolaoye.com
Step 3: Grant Public Access Permissions
By default when you create a Cloud Storage bucket, the access control pattern is set to private. For website visitors to be able to access the content of the website, the access control needs to be changed from Private to Public at the bucket level.
For individual objects that you don't want to share publicly, you can stop publicly sharing an object by removing any permission entries that have allUsers.
gsutil iam ch allUsers:objectViewer gs://www.somideolaoye.com
## publicly share storage bucket
You can assign an index page suffix, which is controlled by the MainPageSuffix property, and a custom error page, which is controlled by the NotFoundPage property. Assigning either is optional, but without an index page, nothing is served when users access your top-level site.
gsutil web set -m index.html -e 404.html gs://www.somideolaoye.com
Step 4: Create DNS Zone & CNAME Record
Cloud DNS is a Google Cloud service that lets you manage domain names and point them to a backend infrastructure such as a load balancer, compute engine, cloud storage bucket, etc.
A DNS Zone can either be Private (visible internally within your GCP network) or Public (visible on the internet). By using the cloud shell commands below, we created a Public zone type and add a CNAME record to the created Zone.
Cloud DNS creates NS and SOA records for you automatically when you create the zone. Do not change the name of your zone's NS record, and do not change the list of name servers that Cloud DNS selects for your zone.
## add DNS Zone
gcloud beta dns managed-zones create somideolaoye-zone-name --description= --dns-name=somideolaoye.com.
A CNAME record is a type of DNS record that directs traffic that requires a URL from your domain to resources you want to serve. In this use case, we creating a CNAME record that points the domain name www.somideolaoye.com to the Google Cloud Storage bucket that we created in Step 1.
## add CNAME record
gcloud dns record-sets transaction add c.storage.googleapis.com. --name=www.somideolaoye.com. --ttl=300 --type=CNAME --zone=somide-olaoye-website
The CNAME record value for pointing a domain to Google Cloud Storage is c.storage.googleapis.com..
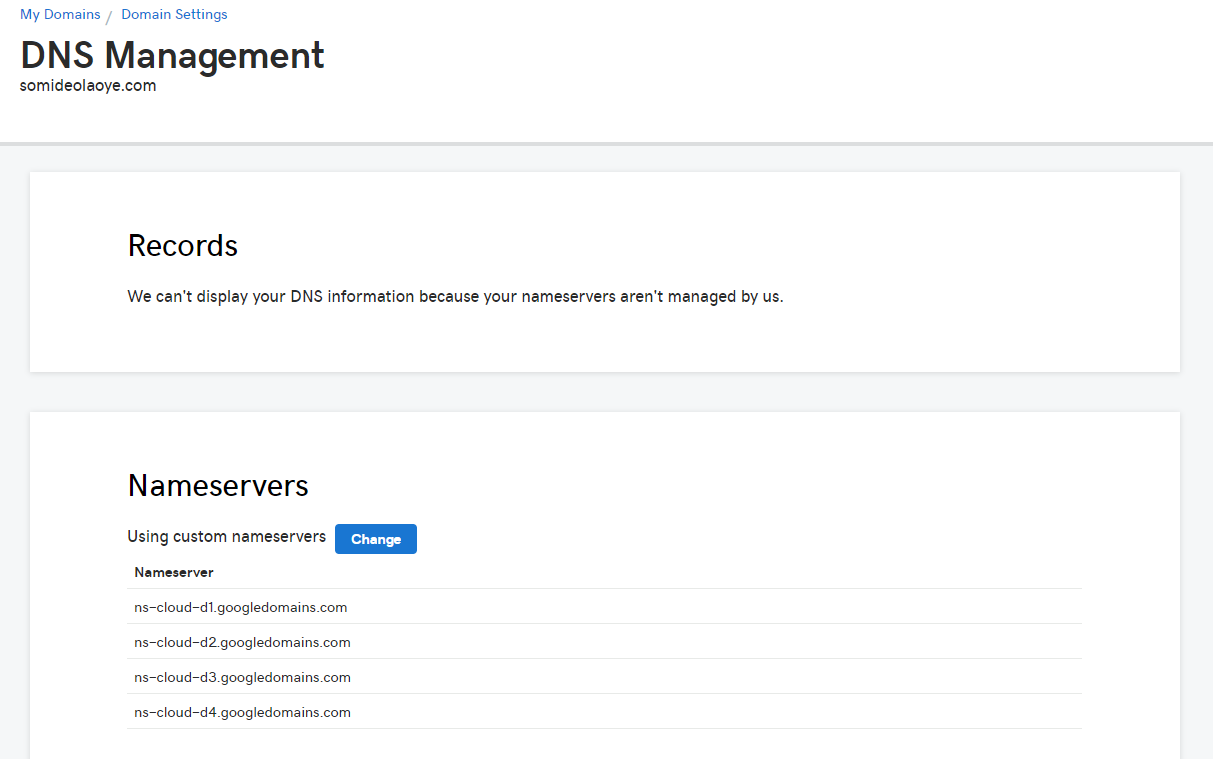
Step 5: Update Domain Registrar NameServer
After creating the DNS Zone, you need to update the NameServer records on your domain registrar by adding the NS record values generated by Cloud DNS. You can register your website domain with any hosting platform of choice but for this use case, the domain was registered on GoDaddy.
Conclusion
Aside from saving cost, hosting your website on Google Cloud Storage gives you a completely serverless architecture (no need for server management) that is scalable and highly-available. You don't have to do any even as your website traffic increases, it's all take care of for you.