

In this article, we explored how to deploy a graph database on AWS using Amazon Neptune, how to load some data into the database, and how to query those data.
The graph data model is rapidly becoming the ideal way for modeling datasets that are highly interconnected. While the relational data model has for long been the standard for representing many-to-many relationships in software applications, it suffers a lot of defects in terms of performance when working on large datasets with complex many-to-many relationships.
Introduction to Graph Databases & Sample Dataset
A graph is an abstract data type that can be used to model complex and non-linear relationships between objects. Every graph consists of a set of points known as vertices or nodes connected by lines known as edges.
Graph databases store data as nodes and edges instead of tables or documents. Graph databases are well-suited for analyzing interconnections between datasets. Common use-cases of graph-like data models include social networks, knowledge graphs, fraud detection, game recommendation engine, etc.
Sample Dataset Explanation:
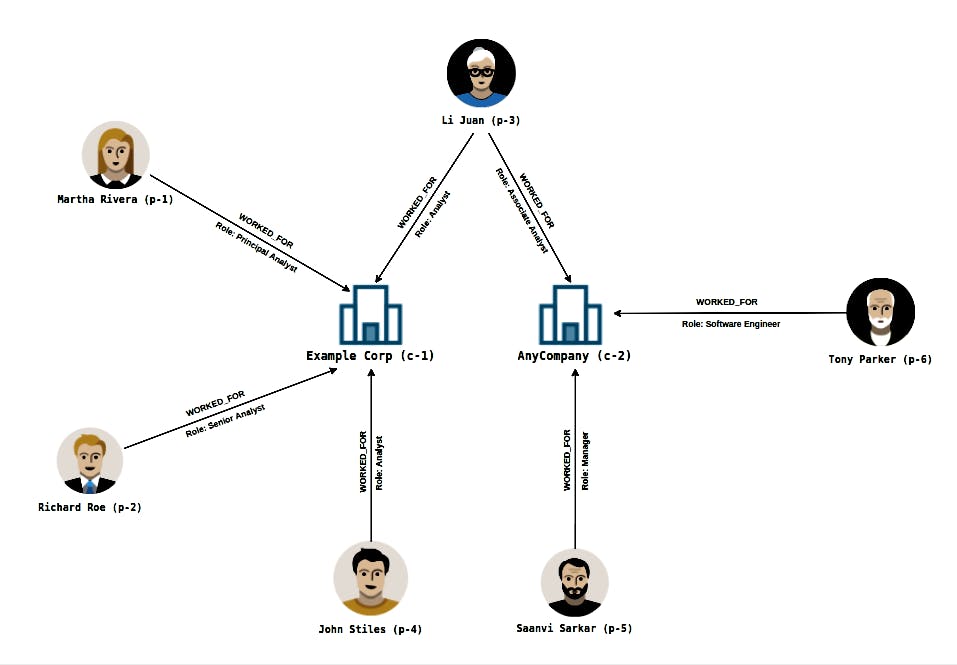
Below is the graphical representation of sample datasets using the graph data model. It's important to understand the below diagram as it depicts the dataset that will be used for this exercise. As shown in the diagram, there are two main objects in our dataset (Company & Person), both will be represented as vertices in our data model, and the relationship between each person and the company they worked for will be represented as the edges.
Deploying Amazon Neptune Graph Database
Amazon Neptune is a fast, reliable, fully-managed graph database service by AWS. Amazon Neptune supports the popular graph query languages such as Gremlin, SPARQL, and OpenCypher. For the purpose of this exercise, we are going to be using Gremlin query language for interacting with our database.
There are multiple approaches to setting up an Amazon Neptune Graph Database on AWS. We can either use AWS CloudFormation or the AWS Web Console. The AWS web console approach will be used for this exercise as this approach is more friendly for beginners and easy to follow.
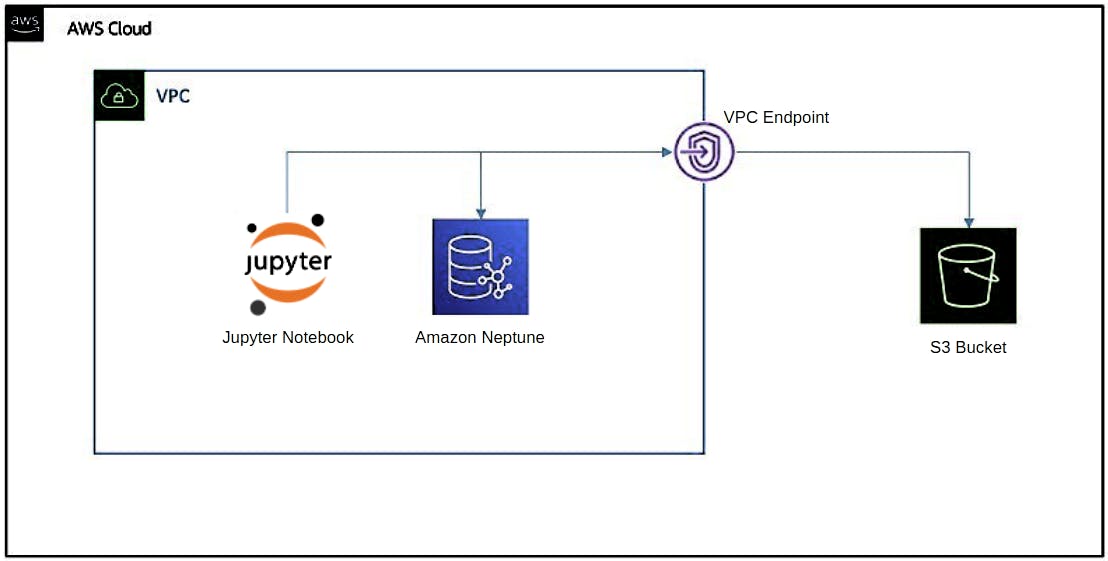
The architecture diagram below depicts what the setup on AWS will look like. The Amazon Neptune database cluster will be deployed alongside an AWS Sagemaker Jupyter Notebook instance which will be used for interacting with the database instance. The sample data to be loaded into the database will be saved as a CSV file (UTF-8 encoding) and uploaded into an Amazon S3 Bucket. A VPC Endpoint will be established as the communication gateway between Neptune and S3.
Step 1: Launch Amazon Neptune Database Instance
In this step, we are going to launch an Amazon Neptune database cluster via the AWS web console. The first action is to go to the Neptune page on the AWS console and click on the "Launch Amazon Neptune" button.
It's important to check the "Create notebook" option in the Notebook configuration section. This will launch the Jupyter Notebook instance that will be used to interact with the Neptune database cluster.
Step 2: Upload the dataset to Amazon S3 Bucket
As mentioned earlier, the CSV file that contains the node and edges of our dataset will be uploaded into an Amazon S3 bucket that can be accessed by both Jupyter Notebook and Amazon Neptune Cluster.
The graph dataset is broken into 3 separate CSV files which can be found in this GitHub repository:
- company_vertex.csv: contains the list of companies.
- person_vertex.csv: contain the list of persons that work for the companies.
- relationship_edges.csv: contains the relationship between the persons and their roles at the companies they worked for.
Once the data is in the bucket, navigate to the IAM page to create an IAM Role that will be used to load the data from S3 to Neptune. Note that the IAM role needs to have the appropriate permissions needed to perform the task and must be attached to the Amazon Neptune Cluster. More information about creating the needed IAM role can be found here.
Step 3: Load data into Amazon Neptune from S3 Bucket
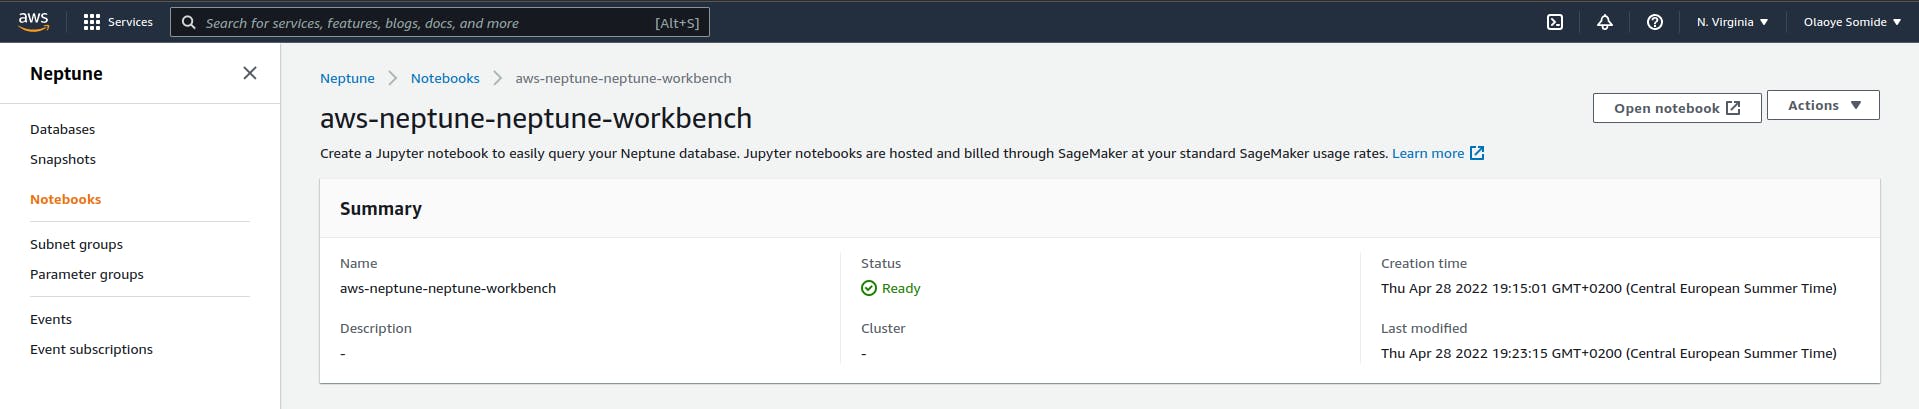
After the configuration of IAM and VPC Endpoint, we can now load the data uploaded to S3 in the previous step to Amazon Neptune. On the Amazon Neptun page of the AWS web console, select the "Notebooks" tab on the left sidebar and launch a new Jupyter notebook environment. Run the "S3 Bulk Loader.ipynb" notebook as shown below.
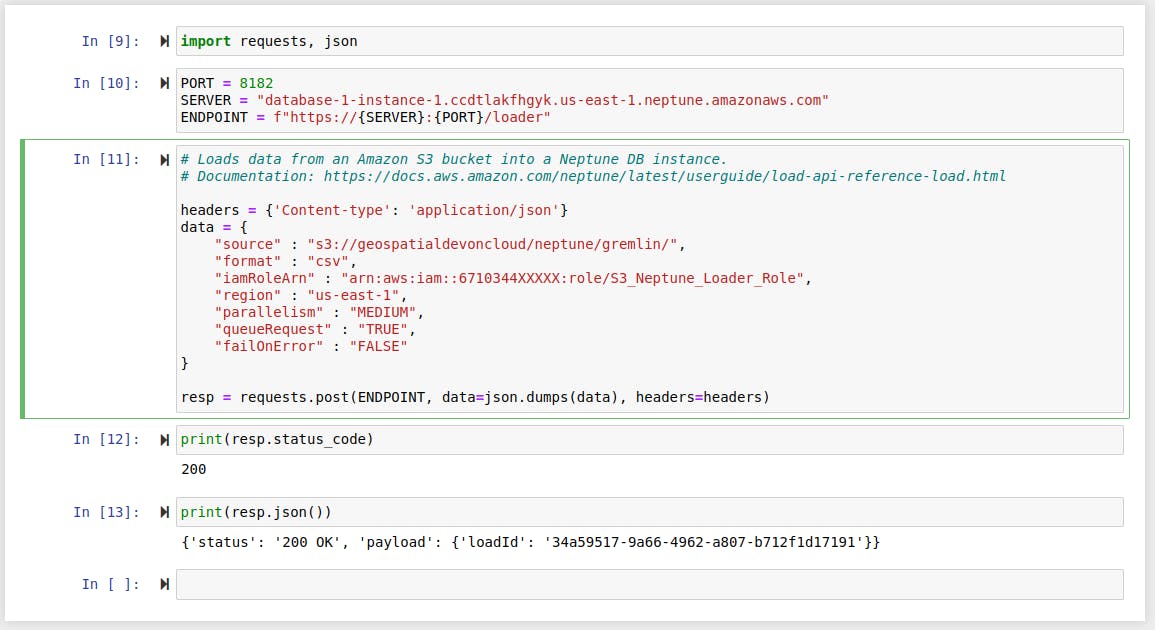
Keep in mind that you will need to replace some of the parameters of the HTTP request with your own values.
Step 4: Query data in Amazon Neptune with Gremlin
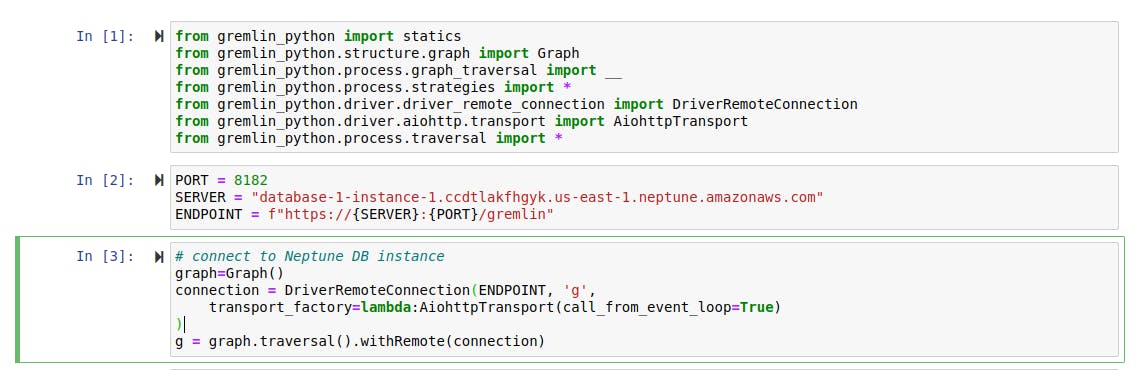
Now that the data has been loaded into the database, let's run sample queries on the dataset that we've imported. Since we will be using the Python version of Gremlin library, we need to import the library dependencies into our Jupyter notebook environment and connect to the Amazon Neptune database. The screenshot below shows just that.
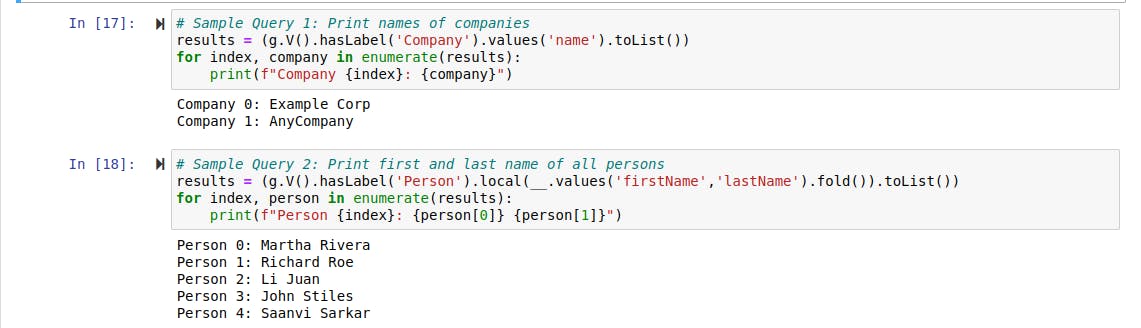
Query 1: Get the names of all the companies in the database.
Query 2: Get the names of all persons in the database.
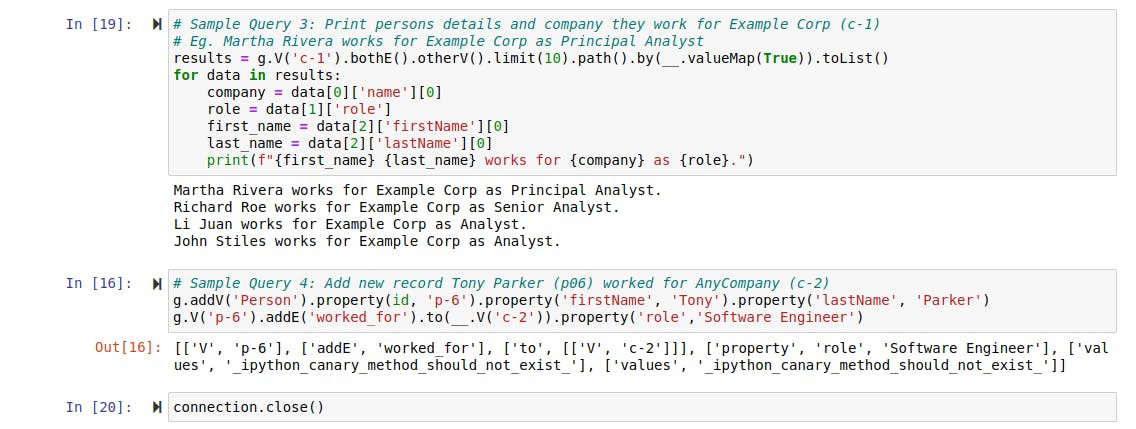
Query 3: Get details of employees that work for a company called Example Corp.
Query 4: Add a new employee record to the company AnyCompany.